
Sending email with Azure Automation and Managed Identity
- Nathan Hutchinson
- Jun 19, 2023
- 7 min read
Need to schedule sending email in a secure manner? Sick of using insecure scripts and scheduled tasks? Bring on Azure Automation and Managed Identities.
First, a guide overview of what they are...
What is a managed identity?
A managed identity in Azure is a secure identity that is automatically managed by Azure AD. It allows you to authenticate and authorize your applications and services to access various Azure resources without the need for explicit credentials or managing secrets.
When you enable a managed identity for a resource, Azure creates an identity for that resource in Azure AD. The identity can be either a system-assigned managed identity or a user-assigned managed identity.
1. System-assigned managed identity: This type of managed identity is tied directly to an Azure resource, such as a virtual machine or an Azure function app. Azure automatically creates and manages the lifecycle of the identity. The identity is only available for use within the context of that specific resource.
2. User-assigned managed identity: This type of managed identity is created as a standalone Azure resource and can be assigned to one or more Azure resources. It allows you to have more control and flexibility over the lifecycle of the identity. You can create, manage, and delete user-assigned managed identities separately from the associated Azure resources.
Managed identities eliminate the need to store credentials or manage secrets within your code or configuration files. They provide a more secure and convenient way to authenticate and authorize access to Azure resources. By leveraging managed identities, you can improve the security posture of your applications and simplify the management of access control.
What is azure automation?
Azure Automation is an Azure service that allows you to automate the management and deployment of resources and tasks within your Azure environment. It provides a way to streamline and orchestrate routine and repetitive tasks, enabling you to focus on more important aspects of your operations.
Azure Automation provides the following key features:
1. Runbooks: Runbooks are automation workflows that are created and executed within Azure Automation. They can be written in PowerShell or Python and can include a series of steps or activities to perform specific tasks. Runbooks can be scheduled to run at specific times or triggered by events within your Azure environment.
2. Desired State Configuration (DSC): Azure Automation DSC allows you to define and enforce the desired state of your Azure resources. It uses declarative configuration files to ensure that your resources are configured and maintained in a desired state. DSC helps with tasks like software installations, configuration updates, and ensuring compliance.
3. Integration with other Azure services: Azure Automation integrates with other Azure services, such as Azure Monitor and Log Analytics, to provide a comprehensive automation solution. You can trigger automation runbooks based on specific events or conditions detected by Azure Monitor, and you can use Log Analytics to collect and analyze automation-related data and logs.
4. Hybrid capabilities: Azure Automation can also be used to automate tasks in hybrid environments, where you have a mix of on-premises and cloud-based resources. By leveraging Hybrid Runbook Workers, you can execute runbooks on machines located in your on-premises environment, extending the automation capabilities beyond the Azure cloud.
Common use cases for Azure Automation include infrastructure provisioning, application deployment, configuration management, and routine maintenance tasks. It helps improve operational efficiency, reduces human error, and ensures consistent and repeatable processes across your Azure environment.
The issue...
I had a client that was generating some Exchange Online reports via a PowerShell script that was ran using a scheduled task on their machine, the user's day to day account was a global admin (doh!) so they had enough permissions to do what was needed.
Very quickly after we started working together, we quickly put a stop to this and implemented Privileged Identity Management (PIM) which as you can imagine, stopped the script from functioning correctly, and this is where this article was born as we needed to produce a modern and secure way to send these reports.
The fix
We opted for an azure automation account with a system assigned managed identity, this ensured there were no secrets or passwords stored in any code and the managed identity was kept with the azure automation account for the lifecycle of the service.
I should shout out to @PanicAcid for his input on this as without him getting this solution up and running would have taken considerably longer - Thanks dude! You can find more of his ramblings and shenanigans here PanicAcid.com – Blog, Diary and Mostly Nonsense
I also highly recommend checking out Tony Redmond's articles on the subject as there is valuable insight in his blog posts of which we'd have struggled without!
Walkthrough
I will now list the steps used from start to finish which will allow you to securely send email using an azure automation account and managed identity.
Prerequisites
Shared mailbox - This will be used for sending email within your azure automation account and script.
Azure subscription - Required to create the azure automation account and managed identity.
Create the azure automation account and managed identity
Head over to the Azure portal and search for automation.

Go ahead and create a new account.

Configure the basic tab with your preferred settings.

The following setting will be dependent on your workload, in our case a system assigned identity is perfect however, if this is part of a larger configuration where it might require additional authentication then it may be worth selecting user assigned so that it can be re-used by multiple azure services.
Depending on your requirements you may wish to use a private endpoint but for now we will stick with public.

Go ahead and assign any tags should you wish and then create the account.
Once the account and managed identity has been created, we then need to assign the required graph permissions, for this you can use the PowerShell.
Before we do that though, lets check to see our managed identity has been created.
From the Azure portal you can select Enterprise Applications.
From the application type filter, choose managed identities.

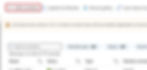
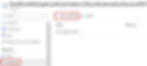
From here you can see all managed identities in your tenant, including the one we have just created. If you drill down into the account, you can see the current permissions assigned to this account.


It's looking a little empty, lets change that!
Start by opening an elevated PowerShell session and adjust the script as necessary for your needs.
Keep note if you have previously been connected to graph you may need to disconnect first.
Disconnect-GraphThe use the following:
# Connect to Microsoft Graph
Connect-MgGraph -Scopes "Application.Read.All","AppRoleAssignment.ReadWrite.All,RoleManagement.ReadWrite.Directory"


# Select beta profile
Select-MgProfile Beta


# You will be prompted for the Name of you Managed Identity
$MdId_Name = Read-Host "Name of your Managed Identity"
$MdId_ID = (Get-MgServicePrincipal -Filter "displayName eq '$MdId_Name'").id


# Adding Microsoft Graph permissions
$graphApp = Get-MgServicePrincipal -Filter "AppId eq '00000003-0000-0000-c000-000000000000'"


# Add the required Graph scopes
$graphScopes = @(
    "User.Read.All"
    "Mail.Send"
    "Mail.ReadWrite"
)


ForEach($scope in $graphScopes){


  $appRole = $graphApp.AppRoles | Where-Object {$_.Value -eq $scope}


  if ($null -eq $appRole) { Write-Warning "Unable to find App Role for scope $scope"; continue; }


  # Check if permissions isn't already assigned
  $assignedAppRole = Get-MgServicePrincipalAppRoleAssignment -ServicePrincipalId $MdId_ID | Where-Object { $_.AppRoleId -eq $appRole.Id -and $_.ResourceDisplayName -eq "Microsoft Graph" }


  if ($null -eq $assignedAppRole) {
    New-MgServicePrincipalAppRoleAssignment -PrincipalId $MdId_ID -ServicePrincipalId $MdId_ID -ResourceId $graphApp.Id -AppRoleId $appRole.Id
  }else{
    write-host "Scope $scope already assigned"
  }
}


#Add Office 365 Exchange Online Permissions for the App Registration


$ExoApp = Get-MgServicePrincipal -Filter "AppId eq '00000002-0000-0ff1-ce00-000000000000'"


$AppPermission = $ExoApp.AppRoles | Where-Object {$_.DisplayName -eq "Manage Exchange As Application"}


$AppRoleAssignment = @{
    "PrincipalId" = $MdId_ID
    "ResourceId" = $ExoApp.Id
    "AppRoleId" = $AppPermission.Id
}


New-MgServicePrincipalAppRoleAssignment -ServicePrincipalId $MdId_ID -BodyParameter $AppRoleAssignment
Sign in with your global admin credentials in the popup window (or an account with the appropriate permissions).

Provide the name of your managed identity and hit enter.

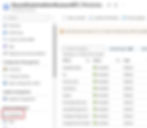
If everything has gone to plan, you should see your managed identity now has the permissions you specified.

Once this has been done, we must assign the Exchange Administrator role to the managed identity, this can be done like so.
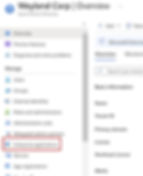
Head back to the Azure portal and select roles and administrators.

Find Exchange Administrator and assign the role to the managed identity.


Now the managed identity has all the permissions it needs, we next need to prep the Azure Automation account and install the required PowerShell modules so it can run the script, so head back to your Azure Automation account.
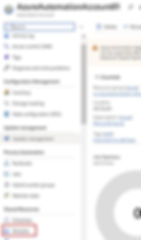
Select Modules under the Shared Resources blade.
The below modules are required for this task.
ExchangeOnlineManagement (5.1)
PackageManagement (5.1)
PowerShellGet (5.1)
Microsoft.Graph.Authentication (5.1)
Microsoft.Graph.Users.Actions (5.1)
Select Add module.


Finally, import the module - Do this for every required module, some modules have dependencies so must be installed in a certain order, the order of those above should work fine.
Once all required modules have been installed it's time to create our runbook so we can send our exchange reports!
Head to the Runbooks tab underneath the Process Automation blade.
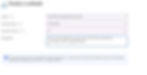
Go ahead and create a new runbook.

Give your run book the most appropriate name and description.
Now you can go ahead and drop your code into the code editor - you can see in the below script we are calling the managed identity using the Connect-ExchangeOnline -ManagedIdentity syntax, because the system assigned identity is tied to the azure automation account, there is no need for any credentials in the script.
# Connect to Exchange Online using Managed Identity
Connect-ExchangeOnline -ManagedIdentity -Organization yourdomain.onmicrosoft.com

# Connect to Microsoft Graph within Azure Automation
Connect-AzAccount -Identity

# Get the access token for Microsoft Graph
$token = Get-AzAccessToken -ResourceUrl "https://graph.microsoft.com"

# Connect to Microsoft Graph using the access token
Connect-MgGraph -AccessToken $token.Token

# Import the module for Microsoft Graph user actions
Import-Module Microsoft.Graph.Users.Actions

# Set the parameters for sending an email
$params = @{
    Message = @{
        Subject = "Meet for lunch?"
        Body = @{
            ContentType = "Text"
            Content = "The new cafeteria is open."
        }
        ToRecipients = @(
            @{
                EmailAddress = @{
                    Address = "user1@test.co.uk"
                }
            }
        )
        CcRecipients = @(
            @{
                EmailAddress = @{
                    Address = "user2@test.co.uk"
                }
            }
        )
    }
    SaveToSentItems = "false"
}

# Send the email using the specified user ID and parameters
Send-MgUserMail -UserId "automationnotifications@yourdomain.onmicrosoft.com" -BodyParameter $params
Make sure to update the following sections.
This should be updated to your .onmicrosoft domain.

Update these to active email addresses in your organisation so you can confirm the runbook, azure automation and managed identity are working as expected.

Update this to the email address of the shared mailbox that will be used to send the email.

This runbook should allow you to successfully test the configuration after which you can update this to your own code.
Now we just need to test the runbook.

After running the test, you should see it complete along with the test email in your users inbox.


From here you can customise the code to do what you need or hand it off to a developer to finish.
Once the runbook has been published, you can configure a schedule and run as required.
Happy automating!